
How to Use a Car Battery Jumper Safely

A dead battery can turn an ordinary morning into a frustrating pause. A Car Battery Jumper can help restart a vehicle, but connecting clamps without care may damage electronics or cause sparks. The safe approach begins before the cables touch anything. Check the vehicle and jumper manuals, park on stable ground, switch off accessories, and keep cigarettes, flames, and metal jewelry away from the battery area. Small details matter.

Look closely at the battery. Do not attempt a jump if its case is cracked, leaking, swollen, or possibly frozen. Identify the positive and negative terminals, and use the vehicle’s designated jump-start points when the manual specifies them. Keep the clamps apart, and never let a clamp touch the wrong terminal or bare metal unexpectedly. Follow the jumper manufacturer’s connection and removal order; designs differ, so guessing is not a reliable shortcut.

Take your time. A rushed connection is still a mistake. This guide explains how to prepare the vehicles, connect a Car Battery Jumper, start the engine, and remove the clamps safely. It also covers common warning signs and situations where you should stop and call for professional assistance. Even experienced drivers can overlook a detail, especially in poor light or bad weather. That is worth remembering. A careful check may feel slow, but it is far better than forcing a start when something looks wrong.
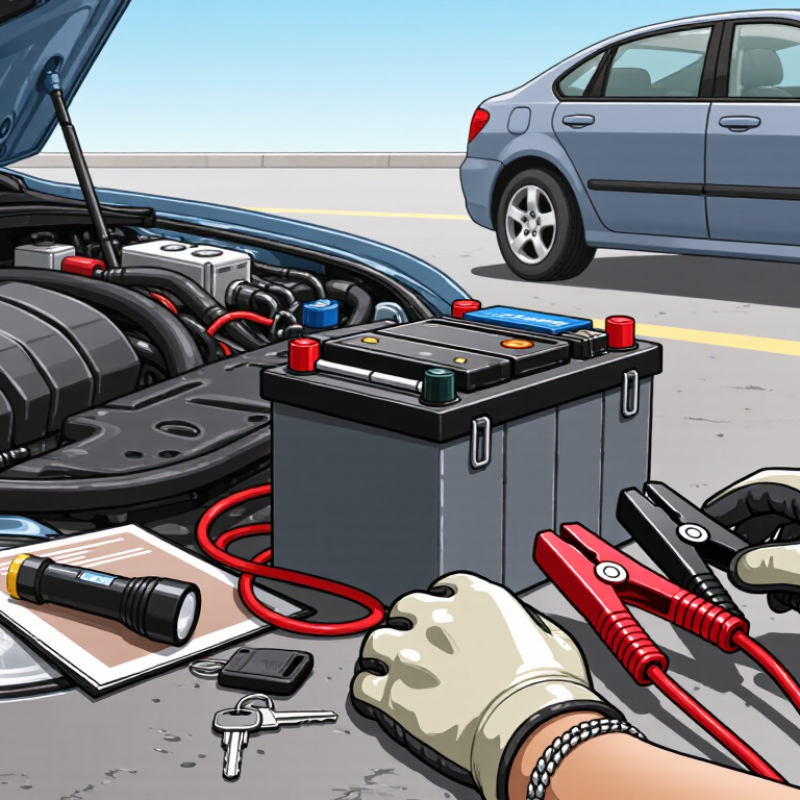
How to Use a Car Battery Jumper Safely

Check Vehicle Compatibility and Identify Battery Safety Risks

How to Use a Car Battery Jumper Safely

Check Vehicle Compatibility and Identify Battery Safety Risks

Before connecting a jumper, check both vehicles’ owner manuals. Confirm the system voltage matches; many passenger vehicles use 12-volt batteries, but do not assume. Some vehicles have designated jump-start points under the hood. Hybrids and electric vehicles may have a separate 12-volt battery, and their high-voltage systems are not jump-start points. Use only a jumper compatible with the battery type and follow its instructions. A quick glance can miss an important difference.

Inspect the battery in good light. Do not jump-start one that is cracked, leaking, swollen, frozen, or unusually hot. A sulfur-like smell or heavy corrosion is a warning to stop and seek qualified help. Keep flames, cigarettes, and metal jewelry away. Turn off the ignition and accessories, and keep loose clothing clear of moving parts. Never let clamps touch each other or the wrong terminals. If you are unsure about polarity or the vehicle’s grounding point, pause rather than guess.

Prepare the Vehicles, Jumper Cables, and Work Area

Choose firm, level ground away from moving traffic. NHTSA’s 2022 Fatality Analysis Reporting System recorded 42,795 roadway deaths nationwide. That figure is not specific to roadside repairs, but it underscores why traffic exposure matters. If a safe position is unavailable, wait for roadside assistance. Switch off both vehicles, engage their parking brakes, and keep people clear of traffic. Check both owner’s manuals for approved jump-start points; some vehicles have remote terminals. Inspect the battery cases and cables for cracks, leaks, swelling, or exposed wire. Do not proceed if anything looks damaged. Small details count.

Use insulated jumper cables with clean, intact clamps. Keep them untangled and away from fans, belts, and hot engine parts. Remove metal jewelry, and keep flames and cigarettes away from the batteries. Wear eye protection if available. A battery can release flammable gas, so sparks near its vents are dangerous. Confirm that both vehicles use compatible electrical systems, as specified in their manuals. It is easy to assume every battery layout is alike; it isn’t. Before connecting anything, identify the positive and negative terminals, and choose the recommended unpainted grounding point on the disabled vehicle. Pause and check the cable instructions. No rushing.

Connect the Jumper Cables in the Correct Order

How to Use a Car Battery Jumper Safely

Connect the Jumper Cables in the Correct Order

Park the vehicles close enough for the cables to reach, but keep them from touching. Switch off both ignitions and accessories. Check the owner’s manual, especially for hybrid or electric vehicles, and do not jump a cracked, leaking, or frozen battery. Pause before connecting. Attach one red clamp to the disabled battery’s positive (+) terminal, then the other red clamp to the donor battery’s positive terminal. Connect a black clamp to the donor battery’s negative (–) terminal. Attach the last black clamp to an unpainted metal ground point on the disabled vehicle, away from its battery and moving parts. Keep clamps from touching.

Start the donor vehicle, wait briefly, then try starting the disabled vehicle. If it does not start, stop and check the manual rather than repeatedly cranking. Remove the clamps in reverse order: ground, donor negative, donor positive, then disabled battery positive. AAA has reported more than 30 million roadside-assistance calls annually, reflecting how often drivers need help with breakdowns. A dead battery is common, but the connection sequence still deserves care; a spark near a battery can ignite gases.

Tips: Keep the cable ends separated while working. Wear eye protection, and avoid leaning over the battery. If the cables heat up, spark heavily, or the vehicle behaves unusually, stop. A few extra seconds to recheck polarity can prevent an expensive mistake.

Start the Vehicles and Disconnect the Cables Safely

Once all four clamps are firmly attached, keep them clear of belts, fans, and other moving parts. Sit in the driver’s seat and start the vehicle with the good battery. Let it idle for a few minutes, then try the vehicle with the weak battery. Use short attempts, around five seconds, and pause between them. If it does not start after a few tries, stop rather than draining the working battery or heating the cables. Check the vehicle manual; some models have specific jump-start points or procedures.

When the engine starts, leave it running and remove the cables in reverse order: black clamp from the grounded metal on the started vehicle, black clamp from the good battery, red clamp from the good battery, then red clamp from the started vehicle. Keep each loose clamp away from the others and from metal surfaces. This part can feel fussy. The sequence is easy to mix up, so pause and check each connection before moving on.

Do not lean over the battery while removing clamps, and avoid touching the metal jaws. If a cable is hot, damaged, or sparking heavily, stop and get professional help. Once the cables are clear, let the engine run in a safe, open area. A successful start does not prove the battery is healthy; if the car struggles again, have the charging system checked.

Check the Battery and Address Any Continuing Problems

A successful jump-start does not prove the battery is healthy. Park safely, switch off the engine, and look for a cracked or swollen case, wet spots, or a sharp sulfur-like smell. Look closely. Do not proceed if the battery appears damaged or may be frozen; contact a qualified technician instead. Check the terminals for loose connections and chalky blue-white buildup. Corrosion can interfere with starting, but it does not identify the root cause by itself. Avoid bridging the terminals with a tool, and keep metal objects away from them.

Notice what happens over the next few trips. If the engine cranks slowly again, the headlights dim, or a battery warning light stays on, arrange a battery and charging-system test. A weak battery is one possibility; a faulty alternator, loose cable, or power drain while parked may also be involved. A proper load test can show whether the battery holds a charge under demand. If you have a multimeter, follow its instructions and compare readings with the vehicle service information, since charging values vary. I might be tempted to blame the battery after one bad start, but that can miss a deeper problem. Record when the trouble returns and tell the technician.

How to Use a Car Battery Jumper Safely - Check the Battery and Address Any Continuing Problems

Stage What to Do Safety Check or Useful Detail If the Problem Continues
1. Prepare the vehicles Park the vehicles safely, switch off the ignition and accessories, apply the parking brakes, and keep the vehicles from touching. Read both vehicle manuals and the jumper-cable or jump-starter instructions. Use only equipment suitable for the vehicle’s system voltage. Many passenger cars use 12-volt batteries, but always confirm the vehicle instructions. If the correct connection points or procedure are unclear, do not guess; consult the manual or roadside assistance.
2. Inspect the battery Check for a cracked or swollen case, leaking fluid, unusual heat, or other visible damage before connecting anything. Do not jump-start a damaged, leaking, or frozen battery. Keep flames, cigarettes, and sparks away from the battery area. Arrange professional inspection or replacement. Do not attempt a jump-start on a battery that appears unsafe.
3. Connect jumper cables With both vehicles off, connect the red clamp to the disabled vehicle’s positive (+) terminal, then the other red clamp to the assisting battery’s positive (+) terminal. Connect a black clamp to the assisting battery’s negative (−) terminal. Attach the final black clamp to the disabled vehicle’s designated ground point, if specified by its manual. Keep clamps from touching each other or moving parts. The final connection is commonly made to a solid, unpainted engine or chassis ground away from the battery, but vehicle instructions take priority. If a terminal is corroded, loose, or difficult to identify, stop and seek help rather than forcing a connection.
4. Start the vehicles Follow the manuals for the vehicles and equipment. With conventional cables, the assisting vehicle is typically started first; after a short wait, try starting the disabled vehicle. Do not crank for extended periods. If the vehicle does not start after a few brief attempts, pause and investigate rather than repeatedly trying. Repeated failure may indicate a deeply discharged or faulty battery, poor connections, or another starting-system problem.
5. Disconnect safely Once the disabled vehicle starts, remove the clamps in the reverse order of connection, keeping them apart. Follow the equipment instructions if using a portable jump starter. Do not let a clamp touch a metal surface or another clamp while disconnecting. Secure the cables away from fans, belts, and hot components. If the engine stalls soon after the cables are removed, the battery may not be holding charge or the charging system may need inspection.
6. Check the battery and charging system Have the battery and charging system tested if the vehicle needed a jump. A battery that repeatedly goes flat should be checked for condition, charging, and excessive electrical drain. A single successful start does not confirm that the battery is healthy. Charging behavior and voltage readings vary by vehicle and operating conditions. Arrange a battery and charging-system test, especially if starting is slow, warning lights appear, or the battery repeatedly loses charge.
7. Address recurring trouble Record when the problem occurs and whether lights or accessories were left on. Check that battery connections are secure only when safe to do so. Modern vehicles, hybrids, and electric vehicles may have designated jump points or special procedures. Follow the vehicle manual; never improvise connections. Have a qualified technician check the battery, terminals, starter, alternator or other charging components, and possible parasitic electrical drain.

Important: Vehicle and equipment instructions take priority over general guidance. If the battery is damaged or the procedure is uncertain, stop and contact a qualified professional.