
How to Choose the Best Thread Fix Kit?
A reliable Thread Fix Kit does more than restore damaged threads. It must match the hole, fastener, material, and working conditions. A kit that looks complete may still be wrong for a soft aluminum housing or a cramped repair area. Check the thread size and pitch before opening the package. Then confirm the kit includes the correct drill, tap, installation tool, and inserts. Small details matter.
Fastener-engineering author John H. Bickford’s published work offers a useful principle, paraphrased here: “A sound threaded joint depends on correct fit, controlled installation, and attention to the materials.” This is not a verbatim quotation. It captures why choosing a repair kit involves more than comparing prices or counting inserts. Look for clear instructions, durable tools, and specifications that match your application. If the manufacturer does not identify supported materials or sizes, pause and verify them.
Think about the repair itself. Is the hole easy to access? Will the joint face vibration, heat, or repeated removal? These conditions can change which insert style makes sense. A careful buyer also checks whether replacement inserts are available. That part is easy to overlook. Even experienced technicians sometimes assume every kit works the same way; it does not. This guide outlines the practical checks that help you choose a Thread Fix Kit with greater confidence, while recognizing that unusual or safety-critical repairs may need assessment by a qualified professional.
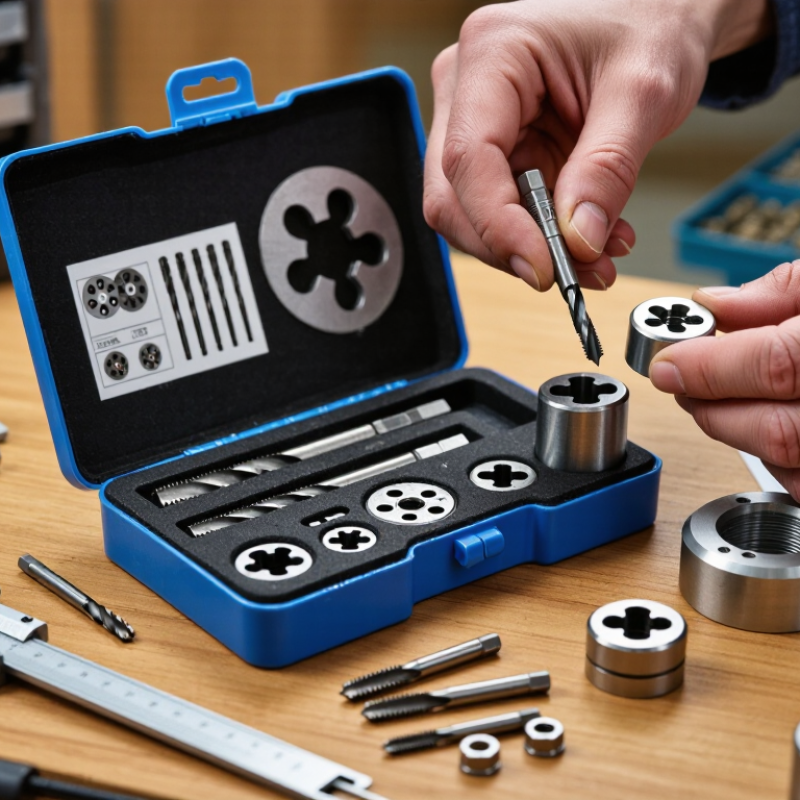
Understanding Thread Repair Kits and Their Uses
How to Choose the Best Thread Fix Kit?
Understanding Thread Repair Kits and Their Uses
A thread repair kit restores damaged internal threads so a fastener can grip securely again. Common kits use wire inserts, which sit inside a newly tapped hole, or solid bushings for more substantial repairs. The right option depends on the part, the damage, and how much load the joint must handle. A stripped thread in a light-duty cover is not the same problem as one in a frequently serviced machine component.
Check the thread diameter and pitch before choosing a kit. A bolt that looks close may still have a different pitch. Kits often include a drill, tap, installation tool, and inserts, but contents vary. Match the kit to the base material, too; aluminum, for example, can be more easily damaged by careless drilling. Keep the tool aligned with the original hole. Small errors matter.
For a shallow or badly distorted hole, a repair may not hold reliably. Stop and inspect it. Follow the kit instructions, use the specified drill size, and clear metal chips before fitting an insert. Tighten the fastener gently during the first check, then confirm it seats evenly. It’s easy to rush this step. Sometimes replacement is the sounder choice, even when a repair seems possible.
Assessing Thread Damage and Repair Requirements
Before choosing a thread repair kit, inspect the damaged hole under bright light. Look closely. Check whether the threads are flattened, crossed, stripped, or missing only near the opening. A small flashlight and a clean probe can reveal damage that grease or metal chips conceal. If possible, compare the remaining thread pitch and diameter with an undamaged fastener.
Do not force a matching bolt into the hole; resistance can worsen the damage.
The repair also depends on the part.
Note its material, thickness, hole depth, and how much load the fastener must carry. A shallow blind hole needs careful depth control, while a through-hole may allow more working room. Measure the available space around the hole, too; some installation tools need clearance.
In practice, damage rarely looks textbook-clean, and a rough visual check can miss stretched threads. That matters. Match the kit’s insert type and dimensions to the original fastener, and confirm that its drill and tap suit the repair.
If the hole is cracked, badly enlarged, or located in a critical load-bearing part, pause and get a qualified assessment rather than guessing.
Comparing Kit Types, Inserts, and Included Tools
Thread repair kits differ in insert style, size range, and the tools they include. A single-size kit can suit a known, recurring repair, while a mixed-size set offers more flexibility. Check both thread diameter and pitch before choosing; matching the bolt diameter alone may produce a poor fit. Small detail, big difference.
Wire inserts are compact and can restore an internal thread while keeping the original fastener size. Solid inserts may provide a sturdy repair, but often need more surrounding material and careful hole preparation. For aluminum parts, check the kit instructions against the part’s condition and material. No insert can reliably fix a cracked or badly worn hole.
Included tools matter as much as insert count. Check for a correctly sized drill, a tap, an installation tool, and a tang-breaking tool if the insert design requires one. Clear depth instructions help protect blind holes. Read the instructions first. Some supplied drills may be awkward in tight spaces, and I would not assume every included tool is suited to frequent shop use. Match the kit to the part, available clearance, and expected repair frequency, then verify dimensions against the fastener and kit instructions.
Matching a Kit to the Material and Thread Size
A thread repair kit should match both the workpiece material and the damaged thread’s exact size. Aluminum often benefits from a stainless-steel wire insert because the insert spreads load across the softer material. For steel or cast iron, check the kit’s stated application and the required drilling force. Plastic needs extra caution; a metal insert can split thin walls if its outer diameter is too large. Not every kit suits every material.
Measure before buying. Confirm the thread diameter, pitch, and system, such as metric or inch-based. A bolt that looks close can still have a different pitch. Use a thread gauge when possible, and compare the damaged bolt with the kit specifications. Check the repair depth too. Blind holes need enough room for the insert and tool, but drilling too deep may damage the part. Small detail. Big difference.
Think about the load and the available space. A coil insert is compact and useful in many repairs; a solid insert may be preferable where greater support is needed, if the part can accept its larger hole. Follow the kit’s drill size and tapping instructions, and clear chips before installation. I’ve found that rushing this step causes avoidable trouble. Still, measurements can be awkward on a worn thread, so verify them against an undamaged matching fastener before cutting.
| Thread Size | Common Application | Suitable Base Materials | Kit Type to Consider | Selection Checks |
|---|---|---|---|---|
| M4 × 0.7 | Small brackets, covers, and light-duty assemblies | Aluminum, magnesium alloy, or steel | Wire-thread insert kit with an M4 × 0.7 STI tap | Confirm the kit includes the correct insert length, drill, installation tool, and tang-removal method. Choose insert length according to available material depth and load. |
| M6 × 1 | General-purpose machine and equipment fasteners | Aluminum, cast iron, or steel | Wire-thread insert kit; a solid insert may suit repairs needing a more rigid insert body | Match the kit to the M6 × 1 pitch. Use the specified STI tap for a wire insert; a standard M6 tap does not cut the required insert thread. |
| M8 × 1.25 | Automotive, machinery, and fixture mounting points | Aluminum, cast iron, or steel | Wire-thread insert kit for common repairs; consider a solid insert where the repair design calls for one | Check the required engagement depth and the material thickness before drilling. Verify that the chosen kit’s drill and tap are intended for the insert system. |
| M10 × 1.5 | Medium-duty brackets, housings, and structural machine parts | Aluminum, cast iron, or steel | Wire-thread insert kit or solid-insert kit, selected for the repair’s space and load requirements | Check hole access, edge distance, and whether the insert’s outside diameter will leave enough surrounding material. |
| 1/4-20 UNC | Equipment panels, general-purpose fixtures, and machinery | Aluminum, cast iron, or steel | Inch-series wire-thread insert kit with a matching 1/4-20 insert and STI tap | Do not substitute a metric kit or a different inch thread pitch. Confirm the kit is for UNC rather than UNF. |
| 3/8-16 UNC | Heavier brackets, equipment mounts, and machine components | Aluminum, cast iron, or steel | Inch-series wire-thread insert kit or an appropriately sized solid-insert kit | Check the required insert length, installation-tool clearance, and remaining wall thickness around the repair. |
| Material and kit guidance: Aluminum and other relatively soft materials often benefit from thread inserts that spread load over a larger engagement area. For steel and cast iron, select a kit rated for the application and follow its installation instructions. In any material, verify the exact thread diameter and pitch, repair depth, drill and tap specifications, and available clearance. Insert length and load capacity depend on the joint design; no single length is suitable for every repair. | ||||
Evaluating Installation Steps and Long-Term Reliability
Judge a thread repair kit by repeatable steps, not by the number of pieces in its case. Check that it specifies the correct drill size, tap, insert length, and fastener. Confirm the parent material and available wall thickness; an insert cannot repair cracked or excessively thin metal. Small details matter. Keep the drill square, clear chips between cutting passes, and start the tap without forcing it. Even a slight angle can leave the fastener visibly tilted. I still double-check this step.
For long-term reliability, consider load, vibration, temperature, corrosion, and how often the joint will be serviced. NASA’s Fastener Design Manual, RP-1228, reports that torque-controlled preload can vary by about 25 percent as friction changes. This figure concerns bolted-joint preload, not a direct comparison of repair kits. Still, it shows why torque alone is a limited quality check. Follow the kit’s torque and lubrication instructions, then inspect insert seating and fastener engagement. For critical assemblies, record installation details and use the specified inspection method. A clean-looking repair proves little. Some kits feel easy to use on a workbench, yet the parent metal may be the real limitation. That deserves an honest check before selection.
